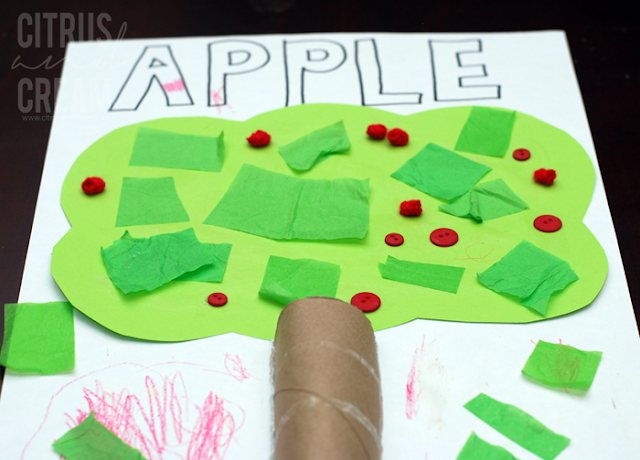
With October being Apple month, I decided to take one of our favorite crafts (tissue paper shapes) and create an apple tree! These crafts have been so fun to do with my little one. I simply give
her a handful of cut-up tissue paper and let her fill in a shape and
glue the pieces down.
Since this time around we were creating an apple tree, I took a look around the
house to see what else we could use for the trunk and apples and found a fun variety of items. She had a blast and is still adding pieces here and there to make it just right. So here is what you need:
 So here is what you need:
White paper (I used 11 x 17)
Green Paper
Green Tissue Paper
Items for the apples- buttons, balled yarn, poms, rolled tissue paper
Glue stick
Cardboard from toilet paper or paper towel roll
First I cut the green paper into the tree shape and cut up all of the tissue paper. Then I let her spend some time applying the tissue to the tree.For the apples, we used buttons and balled yarn. I took 5 strands of red yarn, tied it in knots, then cut the yarn as close to the knots as possible for the ball shape.
While she was placing her leaves and apples I drew an outline of the word APPLE. We then talked about what colors apples come in, how they taste, and we went over each letter (A-P-P-L-E) and made that sound.
When she was done placing everything, I glued the top of the tree to our larger piece of paper and used a glue-gun to glue the cardboard roll to the bottom. Of course, she spent some more time coloring and placed a few falling leaves!
This is really an easy, fun project for you and your little ones to create and talk about apples. If you make one with your little one- post a picture to our Facebook wall- I would love to see it!


No comments:
Post a Comment
We'd love to hear your feedback! Please leave your email address if you'd like us to reply specifically to you.