Image Map

Merry Christmas!

Merry Christmas, friends! We hope this day is full of love, light, and joy!

"Glory to God in the highest heaven, and on earth peace to those on whom His favor rests." Luke 2:14

Love Candace and Stephanie

Continue Reading ...

10 Lessons Learned from Throwing Another Party

Thirty minutes until party time, and this is the scene we have: Kitchen counters are covered end to end with wrappers, dirty dishes, and an even dusting of flour. Drinks aren't made, appetizers aren't finished, and my hair is one frizzy mess. I begin doing my usual dance, running from one thing to another like a stressed out cartoon character when Steph finally shakes me (figuratively, anyway) and tells me to go and fix my hair.

Somehow in the five minutes before 7:00, we pull it together. Guests arrive, and soon we have a drink in their hands and apps on their plates. People are laughing, chatting, and chowing--signs of a good party.

But there are lessons to be learned here, friends, lessons we should have already learned with all the events we have. Here are my notes, written mostly for myself, but available to all crazy party-throwers out there.
  1. Serve what's tried and true. You can whip up all the gourmet food you want, but the fact remains that people love their simple comfort food. We had three appetizers and three desserts, and guess which two plates were licked clean by the end of the night? 7-Layer Bean Dip and Chocolate Chip Cookies. My mini chocolate cupcakes with vanilla-salted caramel buttercream? Hardly a one taken. Steph's beautiful individual mint cheesecakes? She packaged a dozen to bring back home. Even bruschetta and bacon-wrapped asparagus were jealous of the attention the dip was getting! Lesson learned: chocolate chips and tortilla chips never let you down.
  2. Get your nails done professionally a few days before. You say it every time: "I'll just paint them myself the night before the party." You never do, and you never will. And then you'll be kicking yourself when your dress and make-up look great but your nails say that you've been living in the woods for awhile. It will undoubtedly be the best $15 you spend all week. 
  3. Enlist a few friends to contribute a dish to the menu. You may not believe this, but sometimes it's polite to allow others to help. For some people, showing up to a party empty-handed is just the worst. You know which friends love cooking and baking...let them in on the fun.
  4. Read the recipe--the entire recipe, beginning to end--and prepare your ingredients before you begin cooking. How many times must you go through the pain of realizing you're out of eggs or low on powdered sugar before this one sinks in? 
  5. You only have one oven. You seem to forget this each time you host a dinner. One oven.
  6. Prep everything you possibly can the day before. Chop veggies, mince garlic, sift flour, organize ingredients, set the music, swap tea-lights, make frosting, hang garland. You want to enjoy the party just as much as your guests, don't you? Keep the day-of as easy as possible by doing 95% the night before.
  7. Stay away from Pinterest at least 72 hours before the party. 
  8. Be nice to the people who live with you. Your party will be over in an evening, but you'll see them the next morning. 
  9. Life happens, and sometimes people have to cancel. They may even forget. Accept it. They still love you even if they don't make it to your party.
  10. Remember: You are throwing a party for others, not for yourself. If you keep this in mind, then it becomes less about you (and trying to be perfect!) and more about creating a wonderful night for the people you love. Lighten up, have a cookie, and enjoy the evening!
A few favorites from our Favorite Things Party!
We're trying to take these lessons to heart in the next year! We know you may one or two to add, so please share! 

 photo Can-Sig_zpsba361423.png
Continue Reading ...

Pay your bills! {$400 cash giveaway!}

cashgiveaway
This time of the year can be a little overwhelming and stressful, especially on your bank account!  Between the holidays and the new year (and about 20 birthdays in our families!), things just add up. That’s where we come in! We have teamed up with 24 other bloggers who are hosting a HUGE $400 CASH Giveaway!  You heard right, cold hard CASH.  We want to help you out with all those holiday bills, and all you have to do is enter below.  One of our lucky readers will win $400 cash to help out with those bills and start the new year right!

Giveaway ends on Wednesday, January 1st at 11:59 PM EST. Winner will be notified by email and will have 48 hours to respond or another winner will be chosen.
a Rafflecopter giveaway
This giveaway is sponsored by these awesome blogs:
Continue Reading ...

DIY Peppermint Hot Chocolate Party Favors

'Tis the season for parties and celebrations! Since it is far too easy to get carried away with decorations and gourmet desserts (thank you, Pinterest), we can't help but love simple party favors. There's something sweet about handing your guests a little "thank you for coming" as they head home. After all, they're the ones who make the party!

At our recent Favorite Things Party, we gave each of our friends a spice jar filled with homemade hot cocoa mix, complete with a candy cane stir stick. It was a fun and festive way to bid them goodnight and Merry Christmas! Best of all, it was little more than stirring and assembling.
Peppermint Hot Chocolate in a Spice Jar

What You Need
  • Spice Jars - We found these at World Market for about 50 cents a piece, thanks to a couple of coupons! They are usually $1 a piece.
  • Candy Canes with the "hook" broken off, so they become stir sticks
  • Tags - We printed them on pearly paper then used a paper puncher
  • Ribbon to tie
  • Ghiradelli Baking Cocoa (or any good quality cocoa)
  • Sugar
  • Salt
What You Do
  • Mix the chocolate, sugar, and salt in a large bowl. We used this recipe from Martha Stewart, and it was perfect, enough to fill about 20 jars. Fill each spice jar almost to the top.
  • Using scissors, cut/break the "hook" off the candy cane.
  • Secure the candy cane stick to the jar with a ribbon.
  • Tie on your tag.
  • Each jar makes a large cup of extra chocolatey hot cocoa. Empty jar into 1.5 cups of heated milk. Yum!
We love that this favor can be adjusted to fit all kinds of parties and seasons! You could do a spiced chai for Thanksgiving or a cinnamon hot chocolate for Valentine's Day. Any other ideas for changing up this sweet little thing?

 photo Can-Sig_zpsba361423.png
Continue Reading ...

10 Tips for Making the Perfect Pie Crust

It's the season for sweets and treats, and one of our favorites in my family is a rich chocolate pudding pie. The secret to the pie is the pie crust: if it fails, the pie just doesn't taste the same. Pie crust can be a difficult task to take on, especially if you've never made one or don't make them often. But please put down the Pillsbury pre-made dough and try it with these tips––homemade pie crust is ALWAYS better, and you might just surprise yourself! The more you make it, the easier it gets.

We aren't going to give a recipe since most have a favorite or can find one easily. What we are going to give you are tips that have always worked well for us. We aren't pie-crust experts by any means, but we bake a lot of them...and we eat even more!
First, the basics: Pie crust involves mixing a fat (butter, lard, or shortening––I use butter flavored Crisco sticks), flour, and water. Most of the time there will be salt, maybe sugar, perhaps an egg. I've even seen vodka and vinegar used as the liquid! But we are going to focus on tips for a traditional crust.

1. Use all-purpose flour since it has the perfect amount of protein. Pastry flour doesn't have enough, so your crust will fall apart. Bread flour has too much, so your crust will be hard.

2. If you're using a metal mixing bowl or utensils, put them in the freezer. Having everything as cold as possible ensures your fat (butter, shortening, lard) won't melt, which will help keep your crust together.

3. When cutting your fat into flour use a food processor or stand mixer (with the dough blade) or a pastry cutter. These items will help you cut your fat into flour with the most consistency.

4. Make sure your water is ICE cold for the same reason as in tip #2. If your fat melts too much you lose the flakiness of your pie crust.

5. Don't play with it or overwork it! It's probably one of the hardest things to learn when making crust. When adding your water to you fat/flour mixture DO NOT play with it. Do not try and mold it together or knead it––it isn't bread and doesn't need it. Use a spatula or your hand to gently fold your ice cold water into your fat/flour mixture. Mechanical action (like kneading or stiring) will promote gluten formation, which we don't want. We want to form the gluten by adding water to the flour. Too much gluten formation means a tough crust and could also cause your crust to shrink.

6. Chill it for 30 minutes before rolling it out completely. Place it in a large ziploc bag, roll it into a patty and put it in the fridge. This will allow your fat to harden up a bit, which causes those flaky fat pockets when baking. This will also give your gluten time to form.

7. When bringing it back out of the chill, roll it as much as possible in the ziploc bag then cut the bag away. You can also use floured parchment. I use paper towels to roll between. I don't know why it works, but it does.

8. Roll your dough over your rolling pin and roll it back out over your plate. It is a similar method the covering a cake with fondant.
9. Unless you have an excessive amount of dough over the edges of your crust, don't cut if off, just fold it under. Make sure the edge of your crust is flush with the edge of your pie plate. Then pinch it to make it pretty. It doesn't have to look perfect. In fact, it probably never will, and we don't care as long as it tastes good!
10. If you're baking a crust that will get a filling and be placed back in the oven (blind-baking), place a sheet of parchment in your crust and place beans at the bottom to keep your crust from rising up too much. You can also poke with a fork to help steam escape. Be careful though––too many holes could cause you filling to leak though.

There you have it! 10 tips for a perfect crust! If you have dough leftover here is one more tip:
Roll it out, cut some slabs of butter on it, cover it in cinnamon sugar, and roll it up. Place it on a pie dish and back in the oven until golden brown. Then you have this fantastic cinnamon roll with your delicious flaky crust...one of my favorite parts of making pie crust!

We know many of you love baking, so we want to hear from you! What are your tips for the perfect crust?

Continue Reading ...

Local Highlight: Farm Fresh Bowls...A Healthy Drive-Thru!

It's been less than eight months since Farm Fresh Bowls opened its doors, and already the drive-thru restaurant has become a favorite for the Valley. Owners Kristen (De Groot) Vaz and Jacqueline Baxley were able to combine the convenience of food-on-the-go with the nutrition of fresh, local ingredients. That's right––you can stay in your car and still eat a nutritious and delicious meal! (Go ahead and cheer...we did!)

You can find all sorts of tasty meals at 
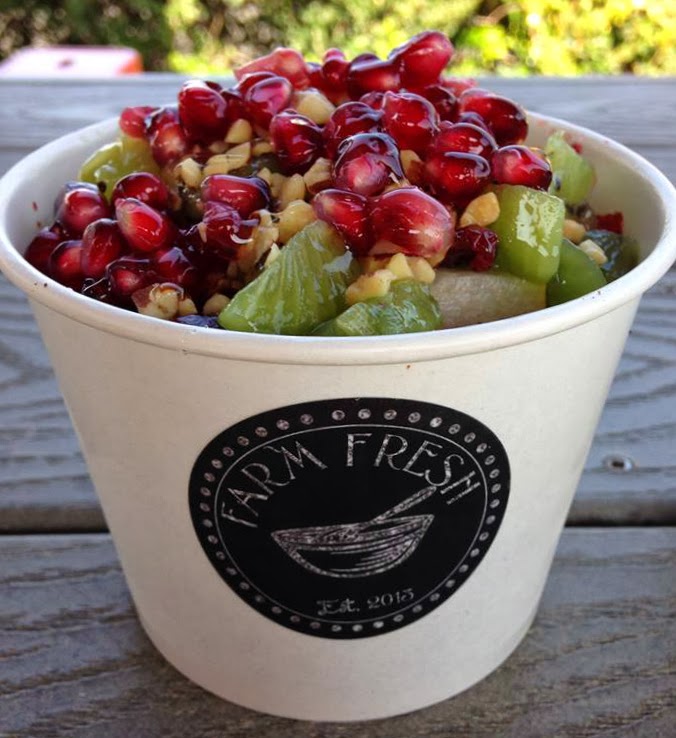
Farm Fresh Bowls: fresh egg scrambles, yogurt parfaits with seasonal fruit and homemade granola, not-your-average oatmeal made with steel-cut and gluten-free oats, and a delightful granola bowl. In addition they have four fabulous Acai bowls that boast superfood principles and nutritional balance, as well as two hot lunch bowls that rotate with the season. And don't forget the energy-fueling treats such as granola bites and sugar plums!

Today Kristen is sharing the vision and passion behind Farm Fresh Bowls. Bon Appetit! 
Tell us about yourselves: Who are the gals behind the bowls?
Jacque and I are two cousins that have the same love for food and nutrition. We were both raised by families who cooked every meal, ate together as a family, and loved food. We also love being active: Jacque’s husband Paul and her three kids have always been into running and cycling. Jacque, her husband, and her daughter even completed a triathlon together! My husband Thomas and I are also both very active and enjoy hiking, hunting, and cycling.

Farm Fresh Bowls is a perfect representation of Jacque and me and our passions. Our slogan is “a healthy drive thru!” We have a few basic creeds that we follow: only natural ingredients (no processed food anywhere), the bulk is local ingredients, and each meal is nutritionally balanced between food groups and portions! We love farmers, and Farm Fresh Bowls is the perfect outlet to showcase their hard work and exceptionally-tasting products! Some of our local ingredients are milk, strawberries, almonds, potatoes, tomatoes, Asian pears, pomegranates, garbanzo beans, kidney beans, all-natural-fed beef, and cheese!
Jacque and Kristen, Owners at Farm Fresh Bowls
What is each of your roles at Farm Fresh Bowls?
I (Kristen) am the operations and accounting side of the business, while still entertaining my “chef” side at least 3 to 4 times a week! Jacque is the HR and marketing side of the business, while also hitting the “line” 3 to 4 times a week. Needless to say we are BUSY ladies!

You mentioned you have a chef side. We want to know more!
My passion for cooking, nutrition, and food actually begin in my undergraduate studies at Cal Poly. I was majoring in Ag Business and minoring in Culinary Nutrition. After receiving my BA, my continued interest in culinary and nutrition led me to attend Le Cordon Bleu Culinary School. It was fascinating. We went through every avenue of culinary arts from international cuisine to artistic food competitions.

Two weeks into culinary school I was hired on as a prep cook at a nearby country club in Beverly Hills. In the ranks of the kitchen, starting at a prep cook was like playing on a prize-winning team as a rookie or freshman. It was huge. I spent two weeks attending culinary school in the morning and putting that to work in the restaurant in the evening. It was exhausting, as well as exhilarating.

In the third week, one of the lead line chefs called in sick and I was thrown into the culinary “lion’s den,” also known as “the line.” This is where are the action happens. Typically this restaurant would serve 150-200 people in 45 minutes to 1.5 hours. As the clock chimed 6 o’ clock, the experienced palates of Beverly Hills swarmed the doors, and it was go time. I started as line lead, calling out all the tickets and doing all final plate presentations. Thank goodness I played a ton of sports and had the competitive nature to swim instead of sink. This business is crazy, and I love it! After several years in the kitchen and the front of the house, I put every angle of my degrees––business, nutrition, and culinary––to work.

What is your inspiration for creativity?
We are always perusing foodie magazines for new ideas and visiting other similarly modeled restaurants.

What makes Farm Fresh Bowls unique from other restaurants?
I would say three things make us unique: We are Local, Healthy, and a Drive Thru! Typically those three components aren’t found in one location. We are also owner-operated and have several employees who are family! It makes it a very fun and pleasing atmosphere.
We hear Farm Fresh Bowls loves serving up fresh seasonal specials. What can we expect these days?
That's right - seasonal is our game! In the fall we had a Pumpkin Spice Granola and a Pom Cran Acai Bowl that was basically Thanksgiving in your mouth! We now have a Gingerbread Granola for the Christmas season. We change out our two hot lunch bowls seasonally. Currently we have a Rustic Tomoto Soup and a Red Smoked Potato smothered with Chicken or Vegetarian Chili, which, I must mention, is not your typical chili. It’s a three squash (acorn, butternut, zucchini) and three pepper chili.
Any changes in store for Farm Fresh Bowls?
We change every season, so come January there will be more exciting options on the menu! We're thinking wheat berries, vegetables, blood oranges, and new granola recipes.

What is YOUR favorite thing on the menu?
My number 1 is the Egg Scramble: it’s a five ingredient natural tortilla filled with 3 farm fresh eggs, red potatoes, applewood smoked bacon and topped with homemade pico de gallo and jalapeno cheese! Don’t miss out on the option to add the veggies: spinach, zucchini, and onion! So good!

What’s on your nightstand and iPod? Proof of Heaven by Eben Alexander and Trans-Siberian Orchestra Christmas music!☺

Something I couldn’t live without is…good food!

My top five faves this month are...Brussels sprouts, green tea, Jacque's chocolate fudge, Moscow Mules, and soft blankets.

Visit Farm Fresh Bowls as soon as you possibly can. You won't be disappointed!

5427 W. Cypress
Visalia, CA 93277
559-786-8818
6:00 am - 4:00 pm (M-F)
8:00 am - 1:00 pm (Sat)
Closed Sunday - Family Day!

Farm Fresh Bowls has a gift for one lucky (and creative!) reader: a choice of a FFB t-shirt or hat, and granola bites or sugar plums! Simply do the following to enter:
1. Like Farm Fresh Bowls on Facebook.
2. Like Citrus and Cream on Facebook.
3. Visit the restaurant, snap a creative photo of your bowl, and post it to Facebook! The most creative photo wins!

Contest ends Monday, December 23rd.

Have you tried Farm Fresh Bowls yet? What's a fave of yours?

 photo Can-Sig_zpsba361423.png
Continue Reading ...

Saturday Snapshot {December 14}

Another week closer to Christmas! We wish we could slow things down a bit, but it seems this time of year always flies. Here were our favorite posts this week, in case you've been spending all your time hitting the shops!
  1. We shared everything you need to know to host your own Favorite Things Party. We even threw in some fantastic freebie chalkboard printables!
  2. We are in love with jewelry designer Tammy Haas! Her simple and beautiful wire wrap jewelry is a perfect accessory.
  3. Gift Baskets have come a long way from potpourri! Check out these updated baskets, all brought to you locally!
Have a fantastic weekend! And don't forget to take advantage of three sales going on at three of our favorite Etsy shops! ComfyFeely (unique and handmade baby/children's clothing), GrayPaperie (custom digital design), and Spirals and Spice (beautiful wire wrap jewelry).

Continue Reading ...

Not Your Grandma's Gift Baskets!

Gift Baskets are an easy and sweet way to show love during the holiday season! And while some of us may have time to create these lovely gifts with hand-picked items and goodies, some would rather leave that job to the professionals! It is so fantastic that we have many local shops that are willing not only to put baskets together, but stock them with some fabulous local items!

For the Gardener: Head to The Gardens at Cal Turf, where they will not only create a gift basket but wrap anything you purchase.
For the Chef: Pacific Treasures offers a great variety of gourmet specialty merchandise, including specialty cookware, kitchen gadgets, gourmet food, and everything for your kitchen and entertaining needs.

For the Home-Lover: PS I love you too will make anyone feel special with their unique gifts to pamper a heart or home!

For the Health Nut (pun intended!): Central Valley Healthy Snacks, The Naked Nut, and Naturally Nuts all offer a large variety of nuts, dried fruits and veggies, specialty sweets, and healthy snacks!
For the Farmers' Market Enthusiast: Family Farm Fresh brings the Farmers' Market to your front door, offering a weekly and bi-weekly subscription service to a basketfull of healthy fruits and vegetables. This is the gift that keeps on giving!
For the Foodie: Bravo Farms has a great selection of gift boxes and baskets with prepicked items. Cousin Eddie's Favorites features eggnog from Top O' the Morn Farms, as well as a moose mug, peanut brittle, and chocolate covered pretzels. You can find their selections here and here or head into one of their shops to make your own custom basket. (And check out the Volcano Box--one of our absolute faves!)
We all know how busy this time of year can get. Head to one of these lovely shops and let them take some of the stress out of your Christmas shopping, all while supporting the local businesses we love.

Continue Reading ...

Local Highlight: Tammy Haas {Unique Wire Wrap Jewelry}

You probably don't know this, but I am accessory challenged. I can't accessorize an outfit to save my life. I have my staple gold and silver earrings and a necklace or two- and that's about as fancy as I can get. So when I find a piece of jewelry that is beautifully simple and can be paired with anything and everything, I fall in love.

This is exactly how I felt when I saw one of Tammy's rings. Tammy creates one-of-a-kind wire wrap jewelry and has FOUR different shops filled with beautiful pieces to meet any jewelry need. Whether you're a bride looking for the perfect gift for your bridesmaids or are in need of a special piece to gift to a close friend or family member, Tammy will not disappoint.

Tell us about yourself!
I am a self-taught wire wrap jewelry artist/designer. I have been working with wire wrap jewelry for the past 10 years. Prior to 2009, I was spending time learning the art of wire wrap design from artists like Sharilynne Miller, Dale Armstrong and many other established artists.

What do your shops offer?
I specialize in creating jewelry with wire wrap art techniques, a very old art form found in history for thousands of years. This type of art form uses techniques to create unique and one-of-a-kind jewelry art pieces. I use this method in creating rings, earrings, necklaces, bracelets, anklets, toe rings, and ear cuffs and other types of pierced body jewelry in my four shops on Etsy: Spirals and Spice (specializing in rings), Simply Ear Cuffs (specializing in ear cuffs and other jewelry trinkets at affordable prices), BridalBliss1 (specializing in Bridal Jewelry and Bridesmaids Gifts/Favors and Wedding Gifts), A Teardrop From Heaven (Specializing in Teardrop Shape Designs and Custom Jewelry).
Why and how did you get started selling?
In 2009, I opened my first online Etsy jewelry shop with encouragement from friends and family who were the usual recipients of the jewelry designs I was creating at that time. I wasn’t sure if I should hold out much hope for a jewelry shop since I was opening it during the beginning of our nation’s slow economic slump. However, to my surprise, my shop slowly took off and steadily began producing more and more sales.

How has your shop changed?
At first I operated my jewelry business on a part time basis while working a day job. By the end of 2011, it was becoming tough to work my day job and complete my jewelry orders and ship them. I worked long into the nights during holiday seasons. In 2013, I decided to take the plunge into full time entrepreneurship and began running my shops with the help of my daughter, Taylor, who helps with shipping and some design. 
What type of special materials do you use?
I use many types of gemstones and metals to create my jewelry pieces. I love to work with Herkimer Diamonds, Sapphires, Rubies and Larimar gemstone. I create designs in solid gold, gold filled, sterling silver, rose gold, white gold, copper, brass and niobium (a non-allergic metal). I also create custom jewelry for those who are looking for something different other than the jewelry market’s mass produced pieces and keeping these designs at affordable prices so that a wide range of individuals can afford to have a wonderful piece of jewelry designed especially for them!

Aside from Etsy, where can we find you?
Recently, I was hired by Michaels to fill the position of Jewelry Instructor. I am having such fun meeting local people at my Michaels classes and having a fun filled afternoon or evening class creating jewelry with some nice, new friends! There are a variety of jewelry classes I teach at Michaels. If there is a specific jewelry piece that customers want to make, I can incorporate that into a class. It’s also great fun to take classes with a friend, family or group! If you would like to take one of my jewelry classes, contact Michaels in Visalia.

Something I couldn’t live without...my children and my iPhone!

Playing on my iPod is..."You Are I Am" by Mercy Me

Stay connected with Tammy and all of her shop updates on Facebook, and be sure to check her out on Pinterest.

As a special treat to our Citrus and Cream readers, Tammy has offered a 15% discount on all of her shops until 12/25! Head over now and finish your Christmas shopping! Use code citrusandcream.

AND, if 15% isn't a gift enough, Tammy is giving away two lovely rings! Enter with the Rafflecopter below. Two different winners will be chosen from the entries.

a Rafflecopter giveaway
Continue Reading ...

How to host a Favorite Things Party!

Have you heard of a Favorite Things Party? A few years ago was the first time I'd heard of something similar, and I loved the idea! What a fun thing to be able to spend time with your friends, share and gift a favorite item, and leave with just as many new favorites! Today, we are going to tell you how to host this party and give you free printables to help!


First thing first: Decide if you are going to host with anyone. Candace and I host ours jointly since it's more fun to plan things together! Plus it makes it a little easier around the holidays if the party prepping is split between two or more friends.
2012 Favorite Things Party
Next you'll want to plan the party details. Create a theme for your party. It can be a festive color combo (we like mint and gold!), a holiday theme (winter wonderland), or any other favorite theme you may have. Pinterest is a great way to plan your party! You can create a private board to pin the recipes you want to serve or even the favorite gift ideas you plan to buy, and you can also create a public board to pin "Favorite Things Party" gift inspiration.

Decide on a budget for your guests. Think about the total amount. You don't want your guest to have to spend more than they are comfortable with, and you know your guests best. I would say between $20 and $40 is usually safe. With that in mind, break it down to how many items you want your guests to bring and the budget for each item. We chose a $30 budget: 3 items, $10 each. Let your guests know how to bring their items, wrapped or unwrapped. (I'll explain more about this below).

Send out your invites and bring all of your friends together. With his type of party, the more the merrier! Facebook is usually an easy way to invite friends. You can even upload a fun image to your invite page header (like the one we are giving you below!). Everyone on your guest list might not have Facebook, so you can send out traditional invites or e-vites, as well.

Put together your menu. You can do a potluck style party, where everyone brings their favorite dish; serve appetizers, drinks, and desserts (that's what we do!); or if you're crazy brave you can host the whole dinner! Do you love pizza? Let everyone make their own! Get creative and have fun! Don't forget to try to incorporate your theme into your food, table settings, and decor.

Plan the night of your party. This us where it gets really fun! When everyone arrives have them place their gifts in a specified area.  Have your guests write their name down as many times as items they brought, so if everyone brought three gifts, they write their name down three times. Place them in a bowl for the gift drawing part. You can choose to have activities or not: you could play a game, have a festive craft set up, or play a favorite movie in the background. And of course you need your best Christmas music playlist!
Enjoy your party, drinks, food, etc. until it's time for the gift exchange, which we like to do last. It can take a bit of time depending on how many people you have, so plan accordingly. When that time has come, grab your bowl of names. You can choose anyone to start, or if you want to set the tone you can begin, as well. 

This is where your party will differ depending whether or not you chose to have your guests wrap their gifts.  Draw as many names out of the bowl as gifts your guest brought. Again, if all of your guests brought three gifts, you will draw three DIFFERENT names. Make sure you don't draw any duplicate names. 
- If your gifts are wrapped, the person who drew the names will grab the gifts they brought and distribute them to the three people whose names she drew. Then, sit back and enjoy watching your friends unwrap your gift and let them know why you love it so much! Pass the bowl and let another friend draw three names and hand out their gifts. Continue this until everyone has given out their gifts!
- If your gifts are unwrapped, the three guests whose name you've drawn get to go shopping for 1 item each. All of the gifts will be unwrapped and displayed, so they will get to look and choose something they'd love! Then draw another three names and let them go shopping for one time each. This process will continue until everyone has gone shopping three differerent times and chosen three different gifts! 

You may be wondering what the pros/cons are of the two different style of gifts giving, so I will tell you, but it's mostly just personal preference. :) 

We choose to have everyone wrap their gifts. There is some excitement in everyone actually getting to unwrap gifts and for the gift-giver to watch as people discover what they've received. The con to this style is that while everyone will no doubt bring great items, there are just some items that your guest won't be able to enjoy to its full potential. Example: Last year I received an awesome little bottle of wine; however, I am not a wine drinker and I was pregnant at the time, so it wasn't a gift that was going to be enjoyed by me. Another friend received a beauty product that she had an allergy to. We actually ended up swapping and the very minor problem was solved!

If you choose not to wrap your gifts, you know everyone will be able to pick what they would use and love. Also, everyone gets to see what the items are and enjoy them before the gift exchange. The thing I worry about with this style is that someone's gifts wouldn't be picked right away and feelings would get hurt. As the host, you could easily fix that if you notice a few items aren't being chosen. Odds are this won't be an issue.

At the end of the night everyone will leave with three new favorite items! 

To help you kick off your party, we have created a few items for you to download and use! Since chalkboards are easily a favorite of ours (and just about everyone else right now) we decided it would be the perfect background for your printables. Plus chalkboards are easily paired with any color scheme.

Included: 
Facebook Invite Header, shown at the top above (download here).

Printable Invite: This can be printed on any 5x7 photo paper or cardstock. You can use either a chalk marker or metallic Sharpee to fill everything in. Click on the links below to download.
  

This is an example of how to fill in the card with prompts (particularly the bottom portion).

Circle favor and gift tags: Print on 8 1/2 x 11 paper and cut, punch a hole, and tie to your gift!

You're all set! Have fun, and don't forget to come back and let us know how it goes or share photos on our Facebook page!!

Copyright: Digital files and downloads are for PERSONAL use only. Commercial use is prohibited. Design and files are copyright Citrus and Cream and cannot be redistributed or edited. If you wish to share these graphics, please link directly to this post, do not host downloads.

Rustic clipart created by We Lived Happily Ever After, you can find it here!
 photo Steph-Sig_zpsa0b0c879.png
Continue Reading ...

Saturday Snapshot {December 7}

December is alive and kicking! We've been busy shopping, baking, and celebrating, some of which we're capturing in this week's wintry snapshot:
  1. GrayPaperie, a new shop that makes chic and trendy announcements, greeting cards, and invitations, is worth a look! Check out the shop, and enter to win a digital download of your choice!
  2. ComfyFeely's easy and cozy baby and children's clothes are too sweet. Take advantage of 20% off all month using the code 2013Anniversary!
  3. We're walking in a winter woodsy wonderland! Check out our favorite ways the woodland trend is brought home!
  4. Gingersnaps just may become your new holiday treat! This recipe is the best. (Seriously.)
Happy weekend, friends! Hope some of your time is spent cozying up by a fire with a cup of hot cocoa and one of those gingersnaps ;)

Continue Reading ...

Gingersnaps, Santa's New Favorite Cookie!

No matter how busy I may be during the holiday season, I always make time to bake gingersnaps. Ever since my mother-in-law introduced these to me, they have become a household staple from November to January. These cookies are delicious––chewy, spicy, slightly crunchy on the edges, perfect with a cup of coffee or a scoop of vanilla bean ice cream. And they are just lovely with their golden color and sugar crackle on top.
While these cookies need no improving, I couldn't help but try out my new reindeer cookie cutter. Except for learning (again!) the hard way that dough must be extra chilled to make cut-out cookies, they were easy and enjoyable to make. Simple white piping along the edge, a cinnamon candy nose, and a mini chocolate chip eye bring these cookies to life. (You can find this cookie cutter at P.S. I Love You Too, in case you're interested! It comes with a santa hat cutter, too!)
Chewy Gingersnap Cookies

Cream together:
3/4 cup butter, room temp.
1 cup white sugar
1/4 cup molasses
1 egg

Blend together:
2 cups flour
2 teaspoon baking soda
2 teaspoons cinnamon
1 teaspoon cloves
1 teaspoon powdered ginger
1/2 teaspoon cardamom

Mix all ingredients together, adding in the dry ingredients to the wet little by little.

To make classic round cookies, use a cookie scoop (or your hands) to make balls, then roll the balls in white sugar. Place an inch apart on a baking sheet lined with parchment paper. Bake at 350 degrees for 10-12 minutes. To give as a gift, stack cookies in a mason jar, top with a white paper doily, and make someone quite happy!
To make gingerbread cutout cookies, you must refrigerate the dough until it is firm (overnight, if possible). Line a baking sheet with parchment paper. Generously flour your work surface and rolling pin, then roll out half of the dough to an even 1/4 inch thickness. (Put the rest of the dough back in the fridge to keep cold.) Dip your cookie cutter in flour for each use. Cut, then place cookie on a cookie sheet, leaving about an inch between cookies. Bake at 350 degrees for six minutes. Let cool completely before decorating. (These turn out a bit harder than the traditional round version, so they'll hold up nicely when decorating.)

White Icing
Mix together 1.5 cups powdered sugar, 1 tablespoon almond milk (add more as needed), a drop of vanilla extract, and a dash of salt. You want your icing to be thick so it pipes easily.

Decorate reindeer by piping the edge with white icing, then adding a red cinnamon candy for a nose and a mini chocolate chip for an eye.
Aren't they the cutest? Cute enough to eat, that's for sure.
And eat them, I will! Try them, friends. I know you'll love them deerly.
*Sorry for all the animal puns lately. I'll try to stop. ;)

We're sharing this recipe with Domestic Superhero!
 photo Can-Sig_zpsba361423.png
Continue Reading ...

Trends Brought Home: Wintry Woodsy Wildlife {Pinterest and Local Round-Up!}

We're feeling foxy these days! That's right: thanks to the wintry woodland trend out there, we've fallen for just about anything with a fox, moose, deer, or bunny on it!

Today, we're sharing our favorite woodland-inspired DIYs and tutorials, as well as a few fantastic local items that you simply moose know about.

First up, our favorite pins from our Woodland Wildlife board. There's a bit of everything here, from simple fingerprint art to fun party cups to beautiful printable tags. Find the full tutorials and printables at the links below.
  1. Faux Pallet Deer Head Art by Lolli Jane {Tutorial}
  2. Woodland Creatures Gift Tags from Lia Griffith {Free Printable}
  3. Funky Moose Party Cup {Tutorial}
  4. Whimsical Woodland Animal Cookies from Dollhouse Bake Shoppe {Tutorial}
  5. Anthro-Inspired Blooming Deer Pillow by Sew Homegrown {Pattern and Tutorial}
  6. Foxy Tights from Anthropologie
  7. Woodland Friends DIY Felt Finger Puppets from Lia Griffith {Pattern and Tutorial}
  8. Fox and Friends Fingerprint Art by Rudy and the Dodo {Tutorial}
Rather shop than tackle a DIY? Check out some of our favorite local items...just in time for Christmas decorating and shopping!
Love You Deerly Print by Anchor and Vine
Birch Wood Deer Tags by Distressed Beautiful
Red Moose Custom Sign by Junk in the Trunk 559
Bunny necklace with custom name charm by juliethefish
Rustic Moose Invitation by GrayPaperie
Custom Woodlands Set by ComfyFeely
What do you think about this trend? Do you love it deerly?

 photo Can-Sig_zpsba361423.png
Continue Reading ...